Groups
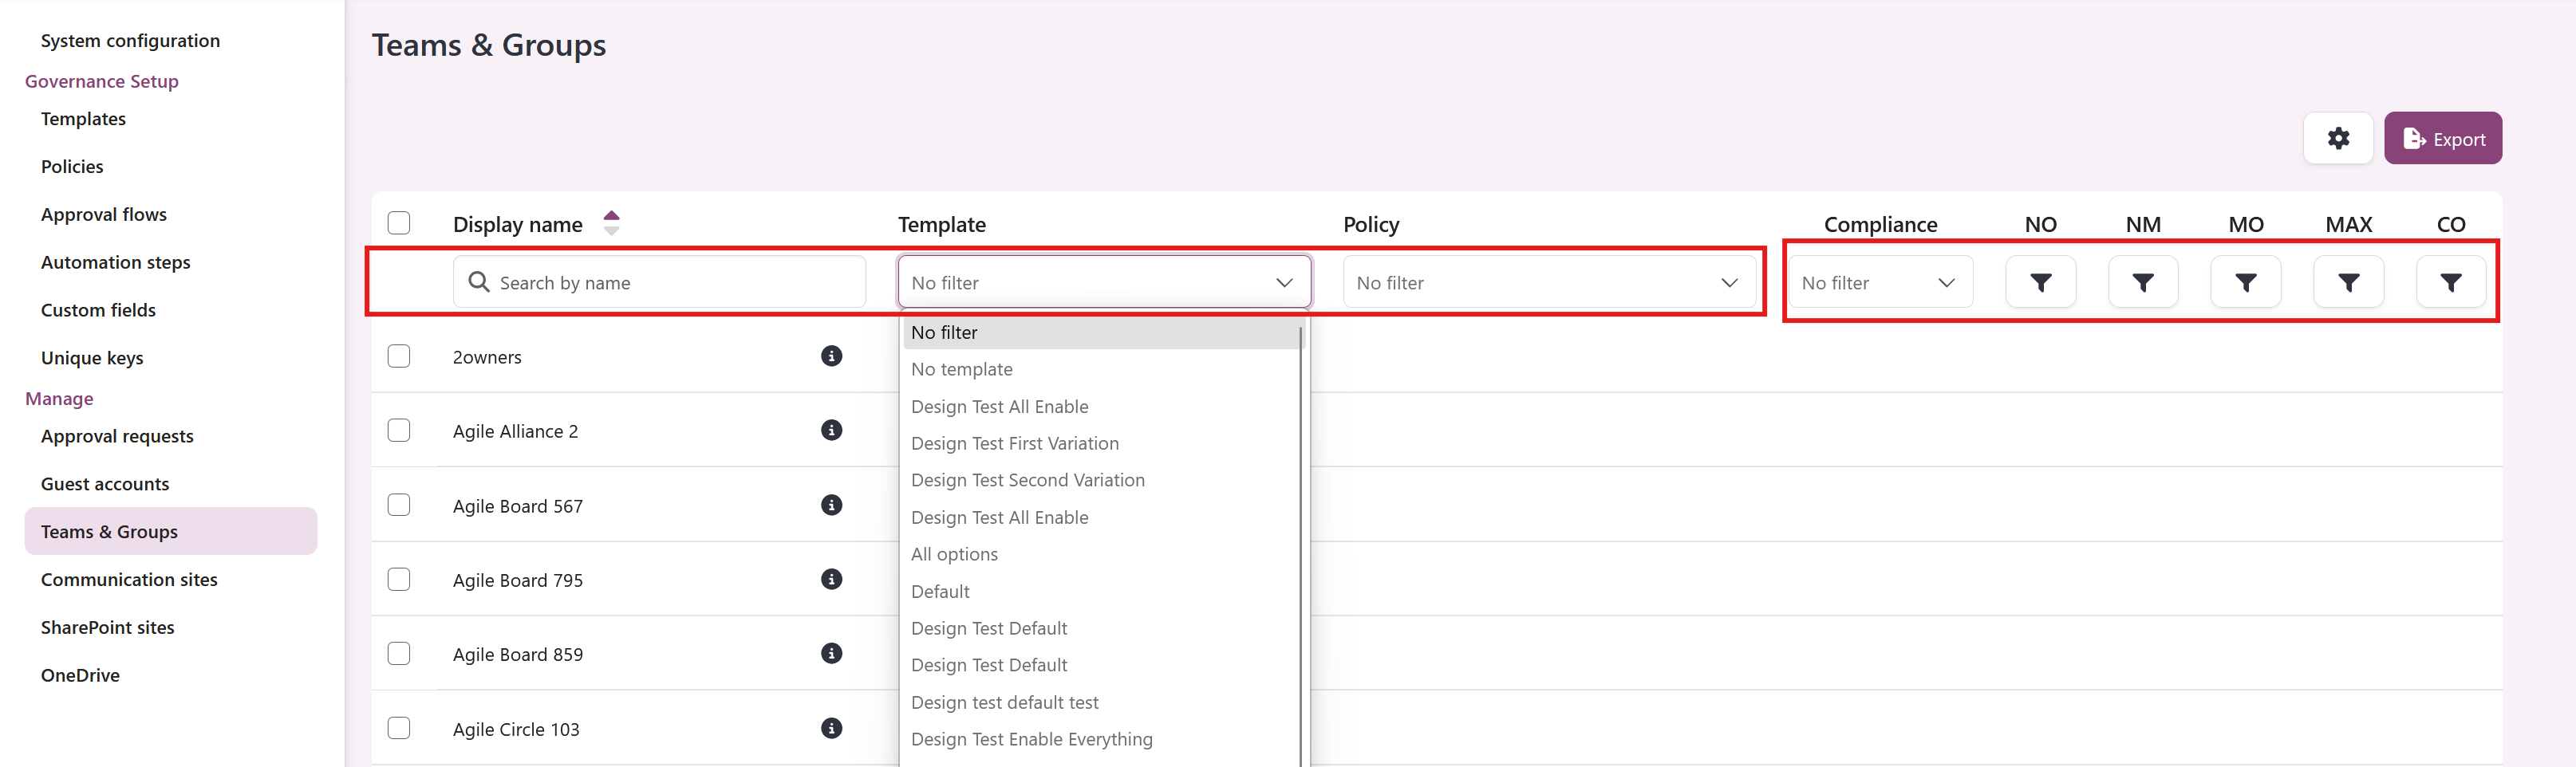
To access all available resources, simply navigate to the Manage button located in the top menu bar within EasyLife 365 Admin interface, then proceed to select Groups. Here, you'll find a comprehensive list of all resources within your tenant, complete with their respective assigned templates and policies. Utilize filters to refine your search by resource name, assigned template, policy, or even the compliance status of each resource.
The overview includes an all-items visualization optimized for large result sets, helping admins review complete resource lists more quickly.
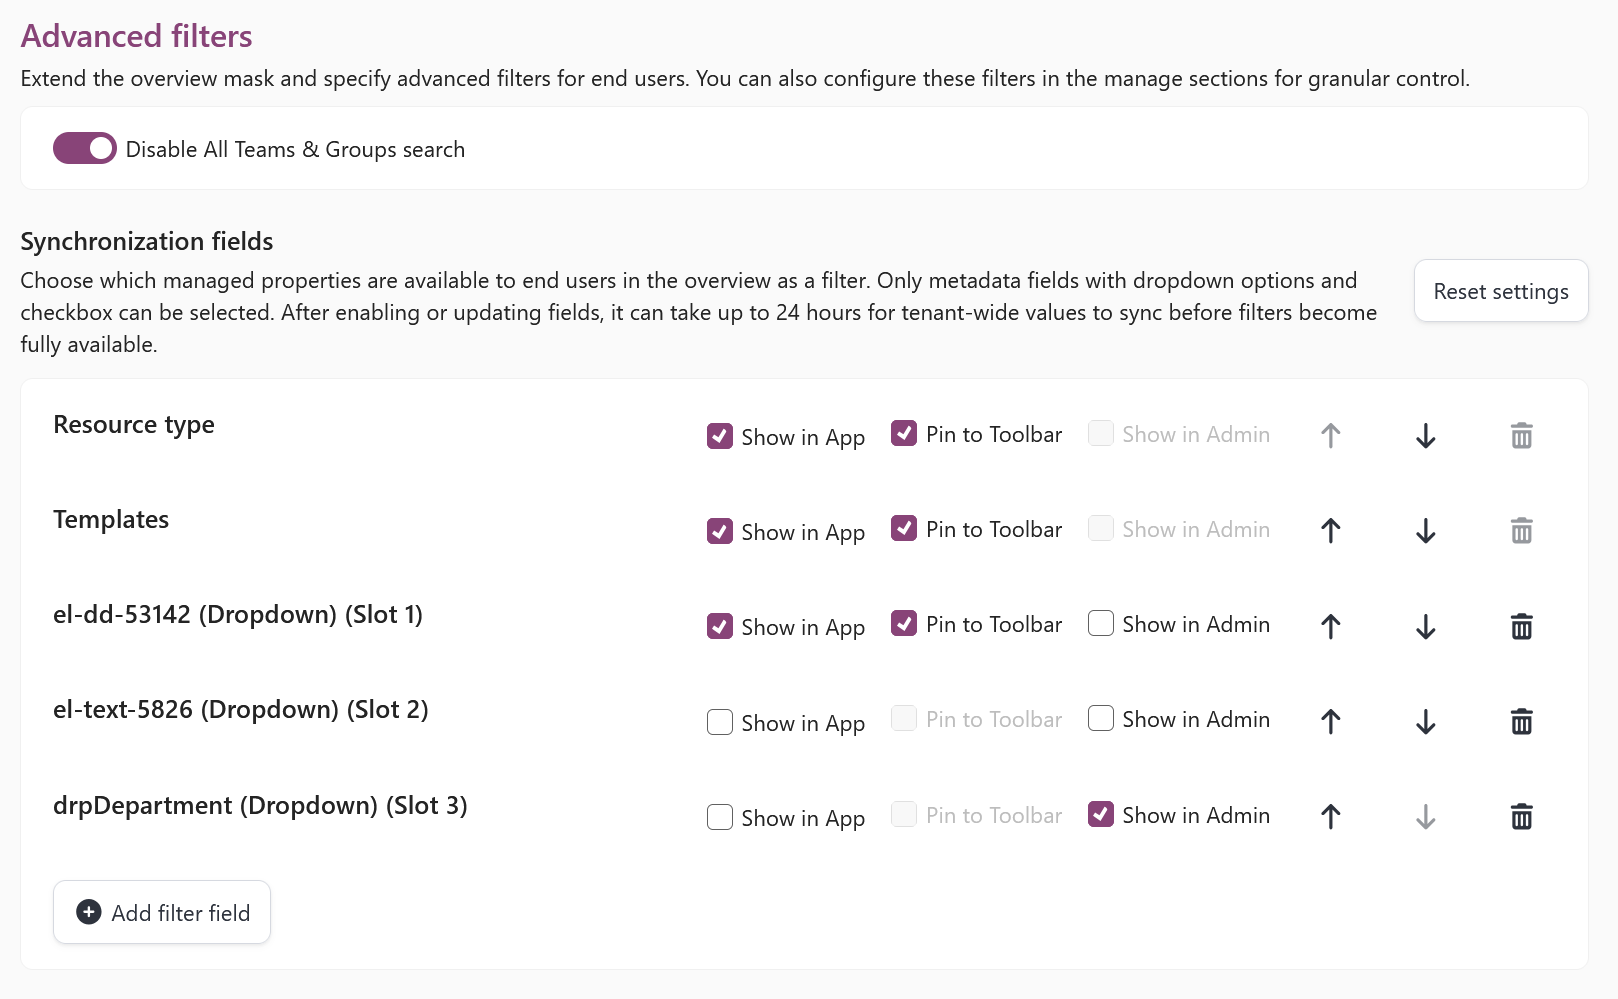
You can also utilize Advanced filters in the overview pages, providing a centralized directory experience. This allows you to narrow down resources based on configured managed properties (dropdown metadata fields). You can configure these filters for granular control with the following options:
- Show in app: Makes the filter visible to end users in the EasyLife 365 Collaboration App.
- Pin to toolbar: Pins the filter directly to the top toolbar for quick access, rather than keeping it inside the advanced filters panel.
- Show in admin: Makes the filter available to administrators in the Cockpit Manage views.
We add some metadata fields to the advanced filters for groups, which can be used to filter groups based on their value.
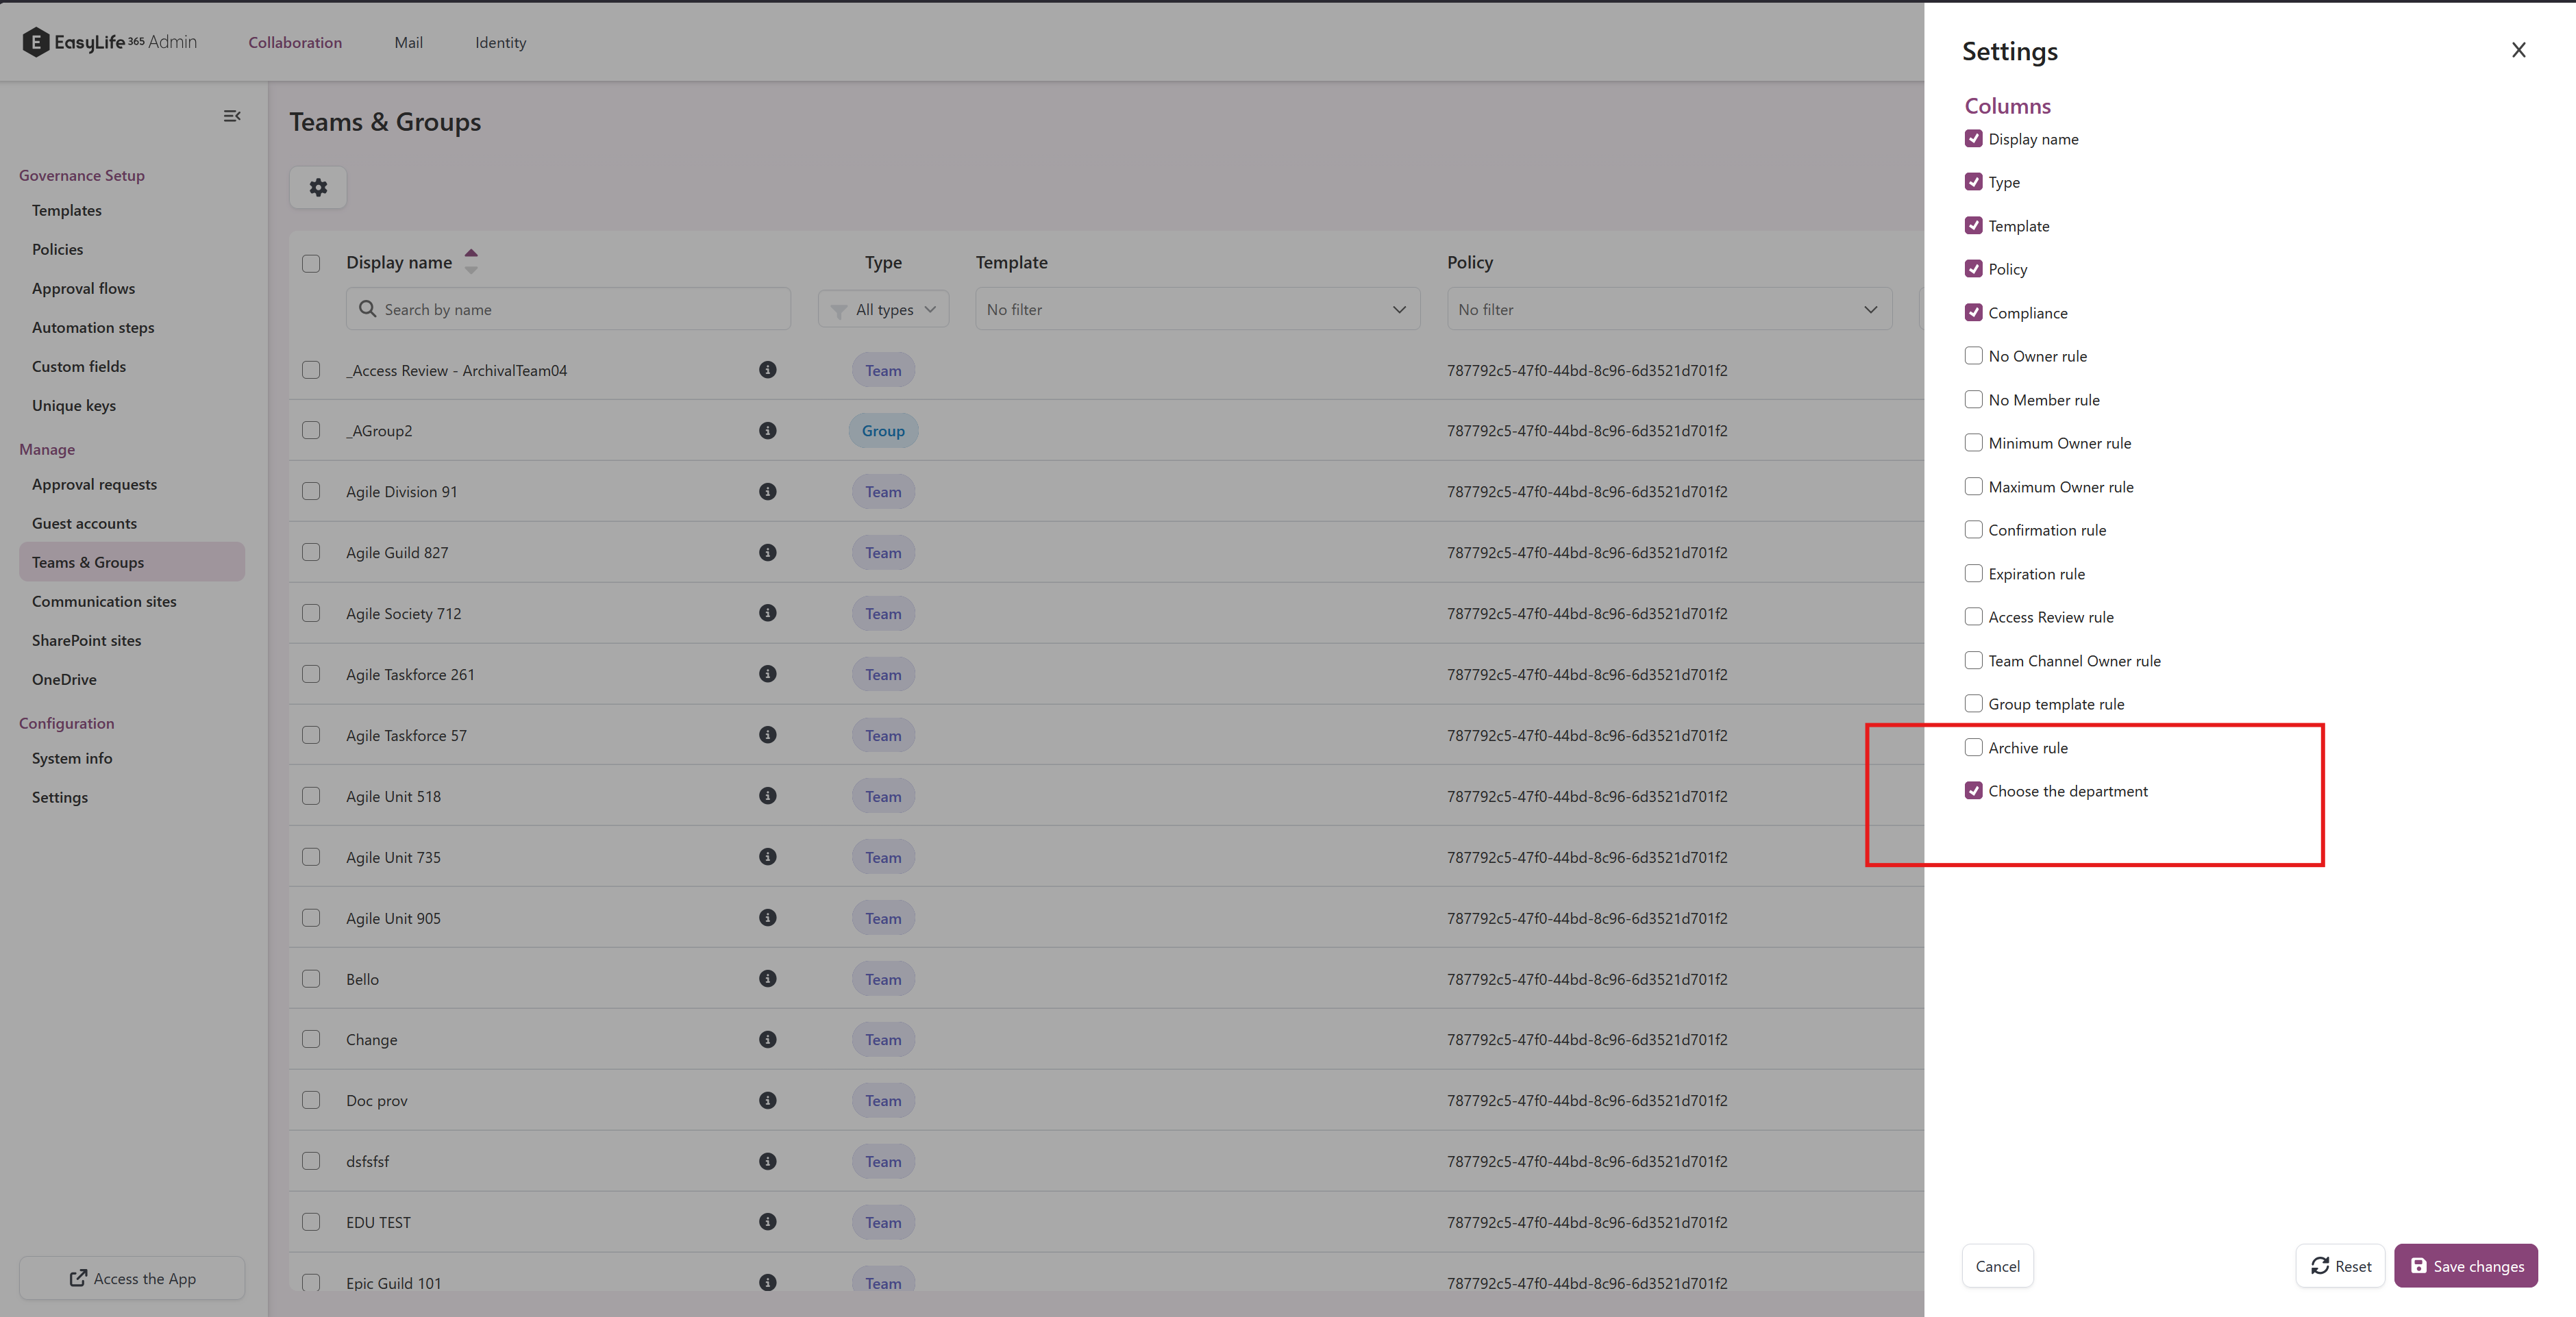
In admin we will have the same filters in the side panel but with the option to pin them to the toolbar for easier access:
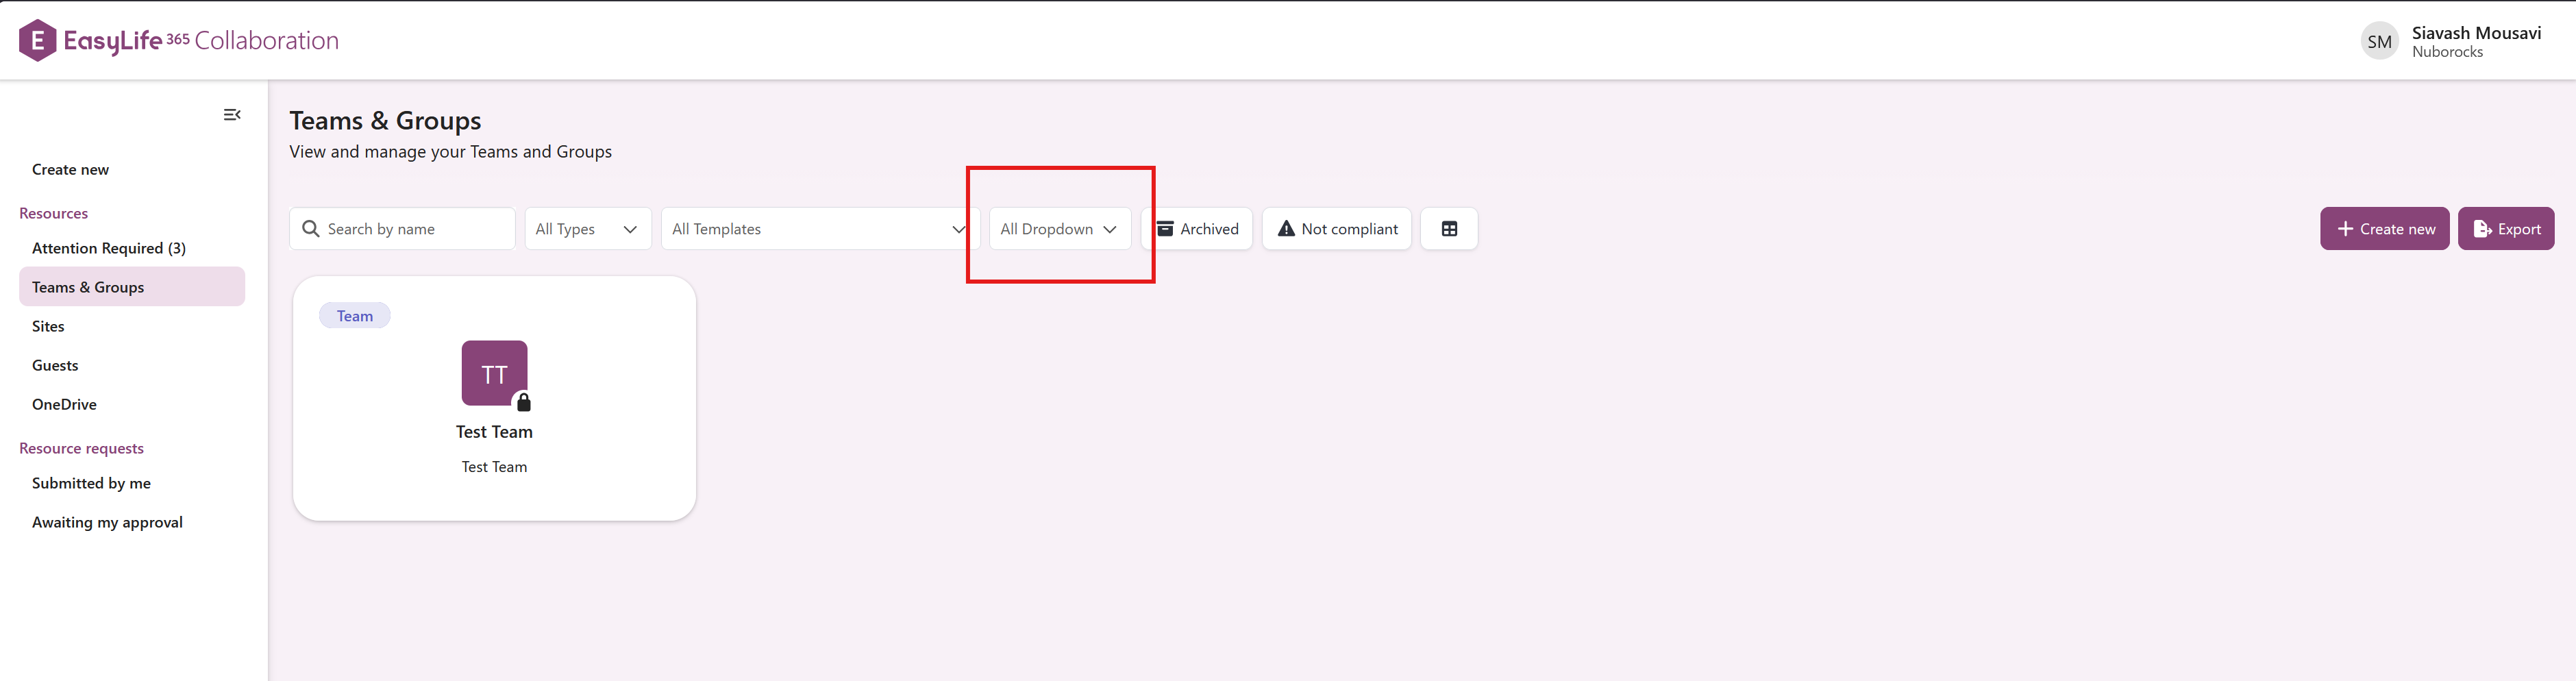
And in the app we will have the same filters pinned to the toolbar for easier access:
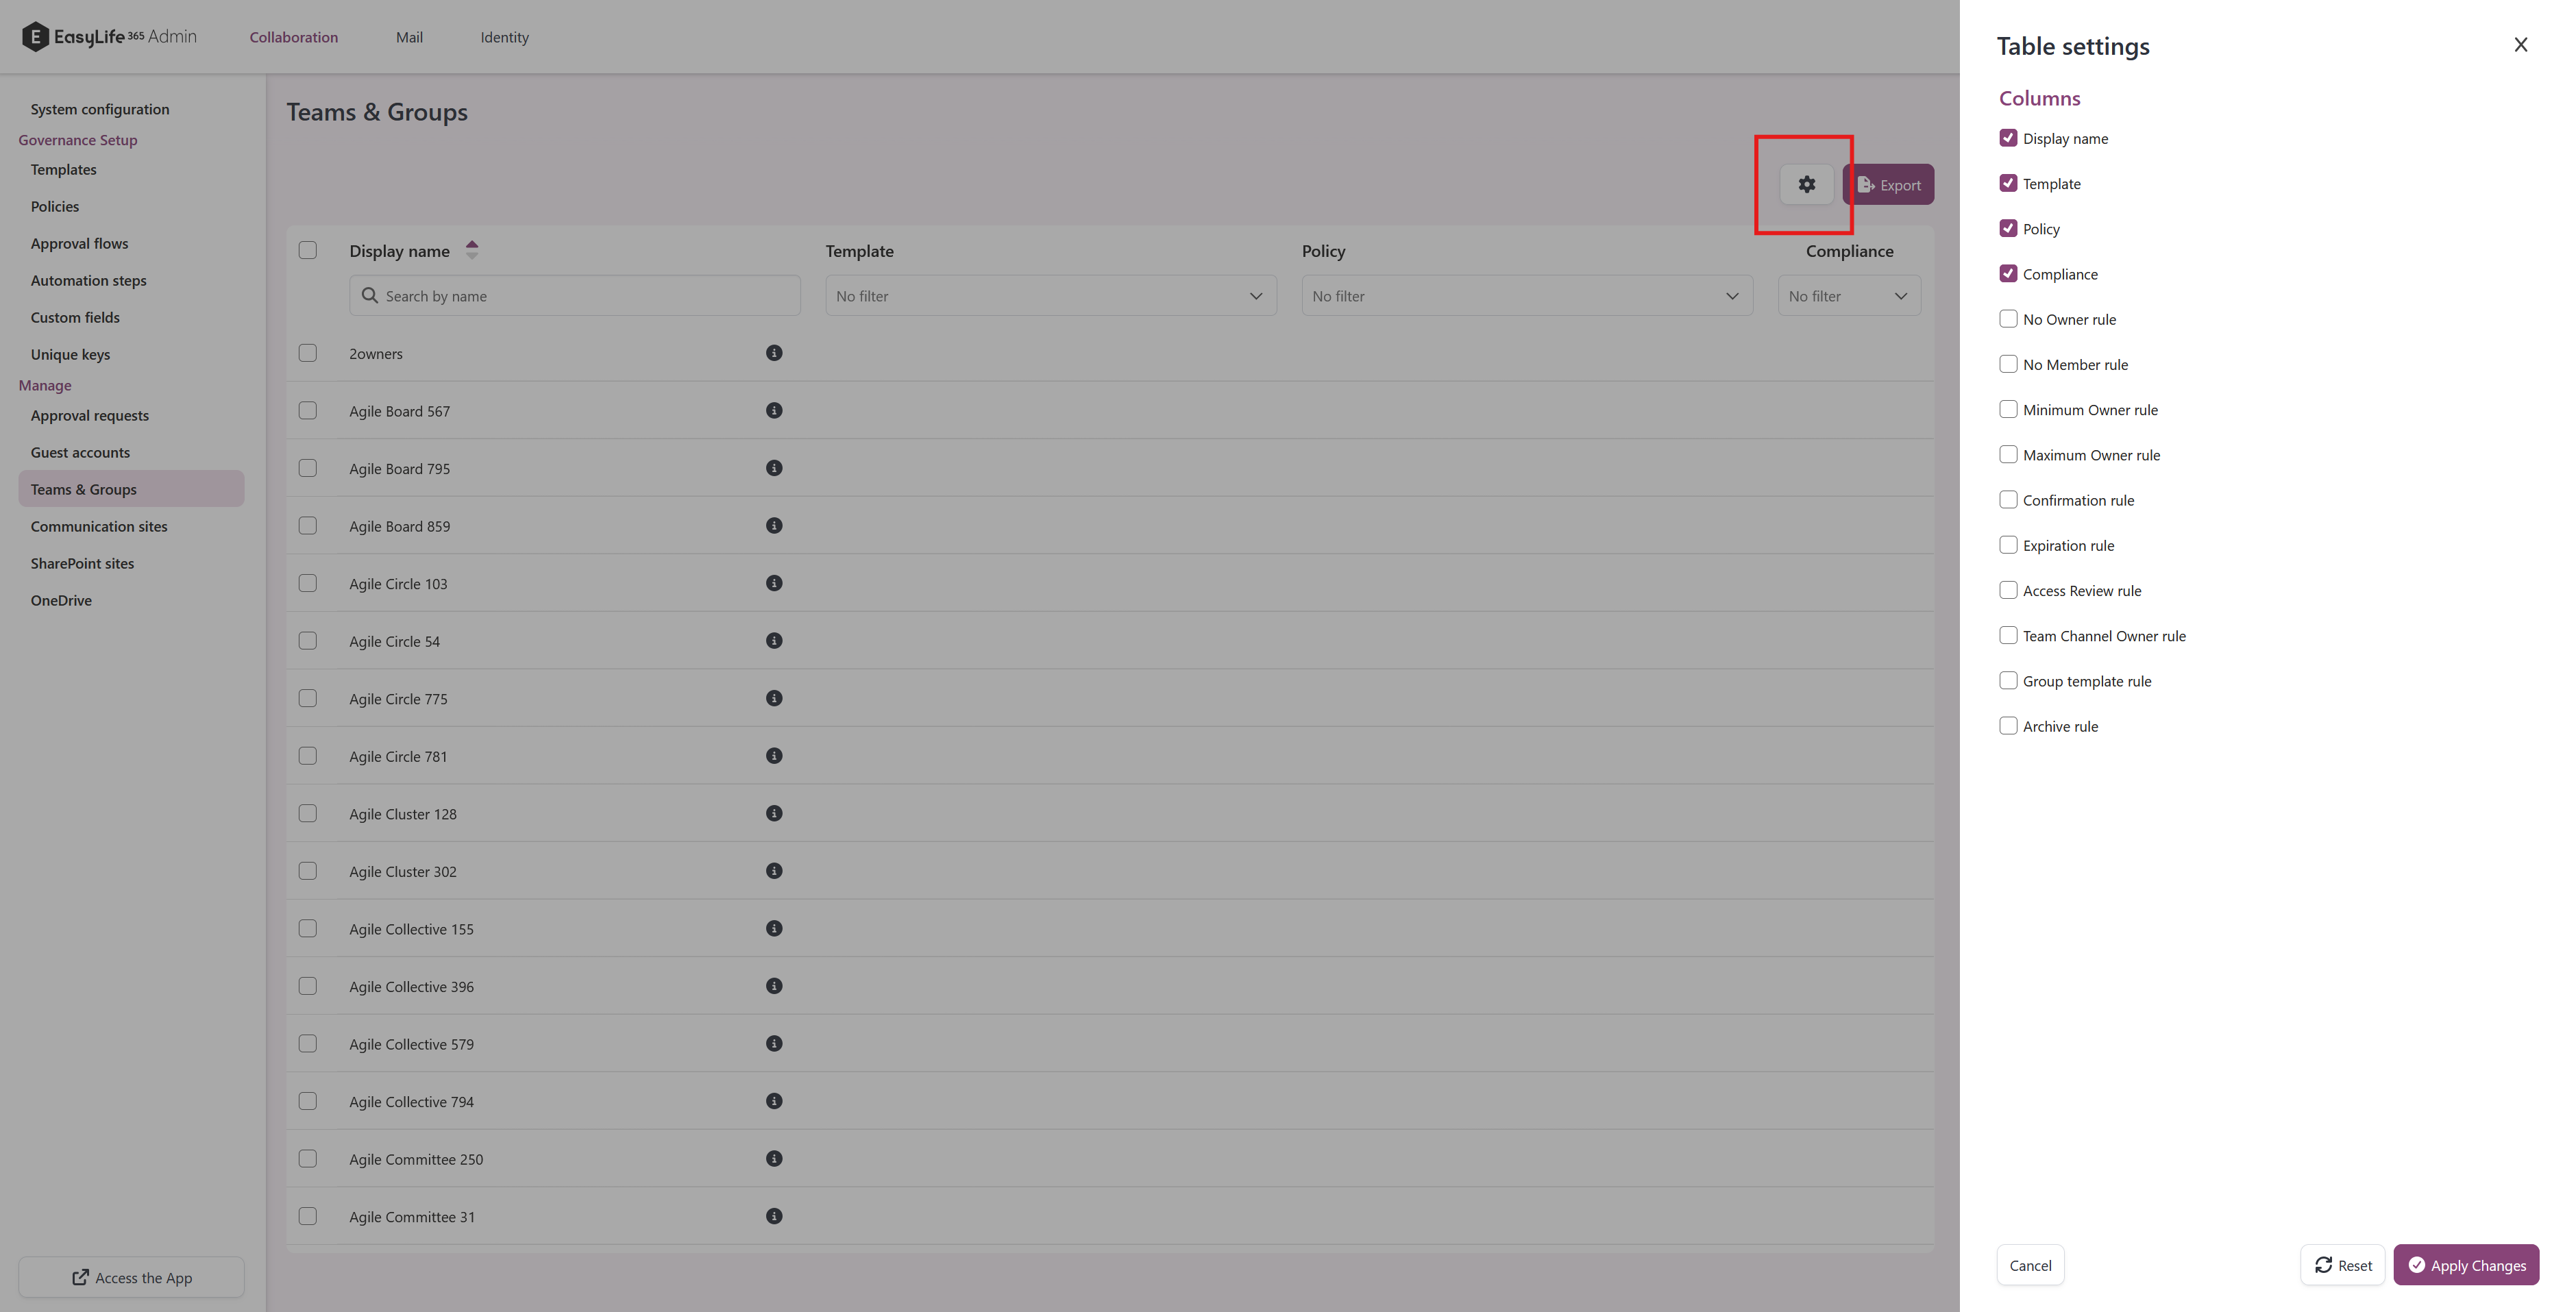
Overview - Show/Hide Columns
The overview table allows you to customize the displayed columns. To show or hide specific columns, click on the column chooser icon located at the top right corner of the table. This will open a panel where you can select or deselect columns based on your preferences.
For archived Teams, the Details panel now also shows the detected archival date when this timestamp is identified by the platform. This helps you understand how long a Team has been archived without leaving the management context.
Archive column
When Settings → Teams & Groups → Archive settings uses an archive connector other than Teams default, the overview gains an Archive column.
The column shows a badge only for a resource that is recorded as archived — Site archived under the Microsoft 365 Archive connector. Active resources and resources whose state EasyLife has not recorded yet leave the cell blank, so a blank cell means "not established", not "active".
The badge is drawn from state EasyLife already stores, so the column costs no extra query.
With the Teams default connector the column is not shown at all, and the table looks exactly as it always has.
Archiving from the overview
Select one or more resources to reveal the archive action in the toolbar. The button names the direction it will take, and the panel opens on that direction.
| Selection | Button |
|---|---|
| One resource, recorded as active | Archive Group/Team (Teams default) or Archive site (Microsoft 365 Archive) |
| One resource, recorded as archived | Unarchive Group/Team (Teams default) or Reactivate site (Microsoft 365 Archive) |
| One resource whose state is not recorded | Change archive state |
| Several resources | Change archive state |
Change archive state is a neutral action: you choose the direction inside the panel, per resource.
An unrecorded state no longer defaults to Archive. Offering a direction EasyLife has not established would pick the wrong one as often as the right one, so the panel resolves the state first.
Under the Teams default connector, a group with no Team offers no archive action, because that connector can only archive Teams. Under Microsoft 365 Archive the site is the container, so a group with no Team is archivable.
Archiving through Microsoft 365 Archive runs in the background and can take a long time to finish. The list keeps showing the previous state until it completes. The panel says so before you confirm.
Compliance panel
The Details panel lists only the rules that are actually being evaluated on that resource. See Compliance panels for what is shown and why.
Bulk Editing
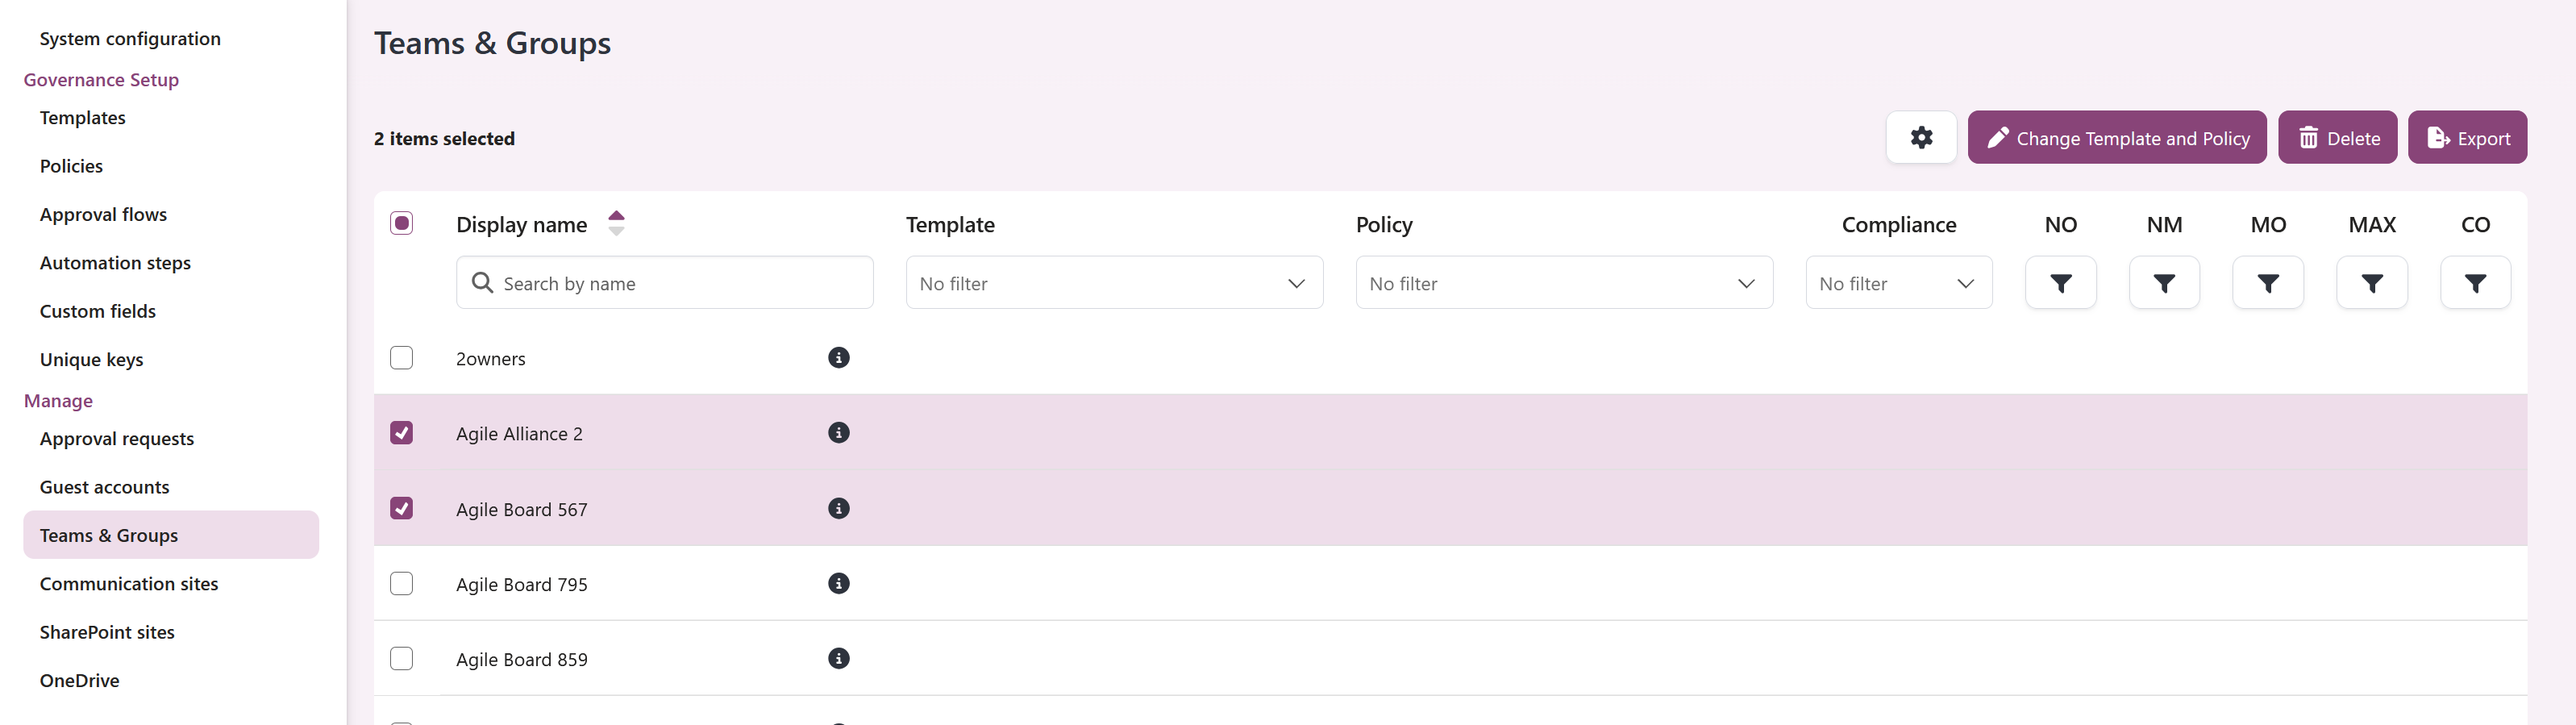
For efficient management, you can assign a new policy to multiple resources simultaneously. Begin by selecting the desired resources using the checkboxes beside their names. Next, click the Change Template and Policy button located above the resource list.
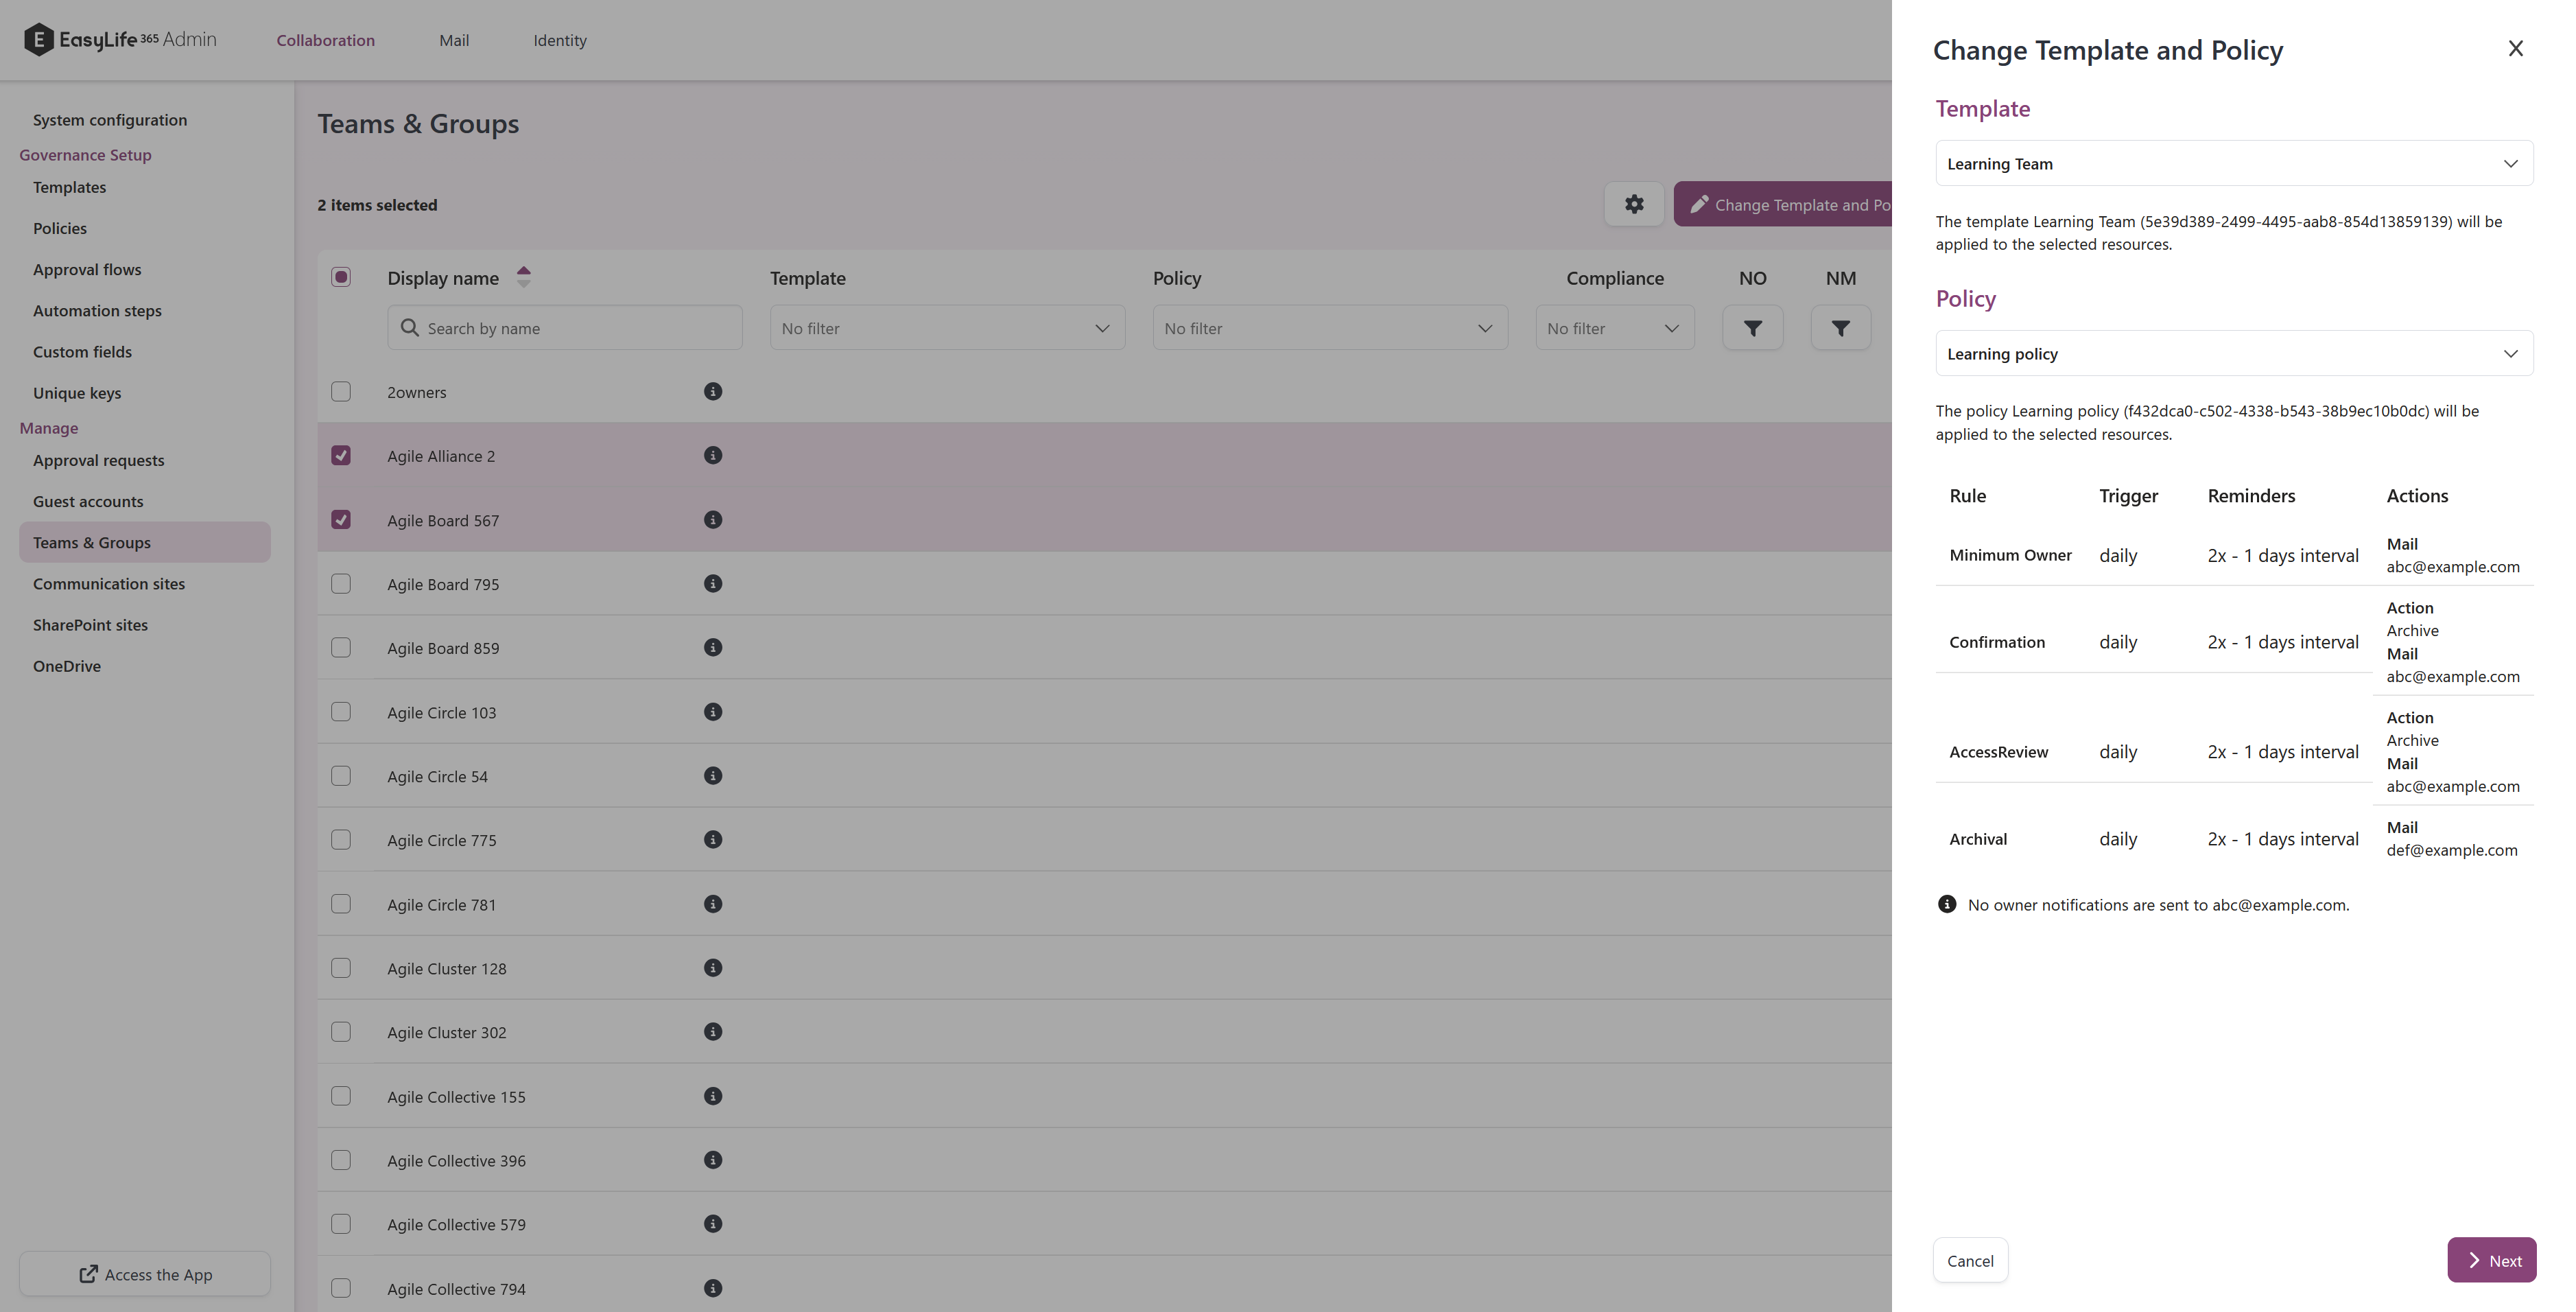
Afterward, select the preferred policy and/or template and proceed to the next step. A concise overview of the chosen policy and/or template will be provided, allowing you to verify your selection.
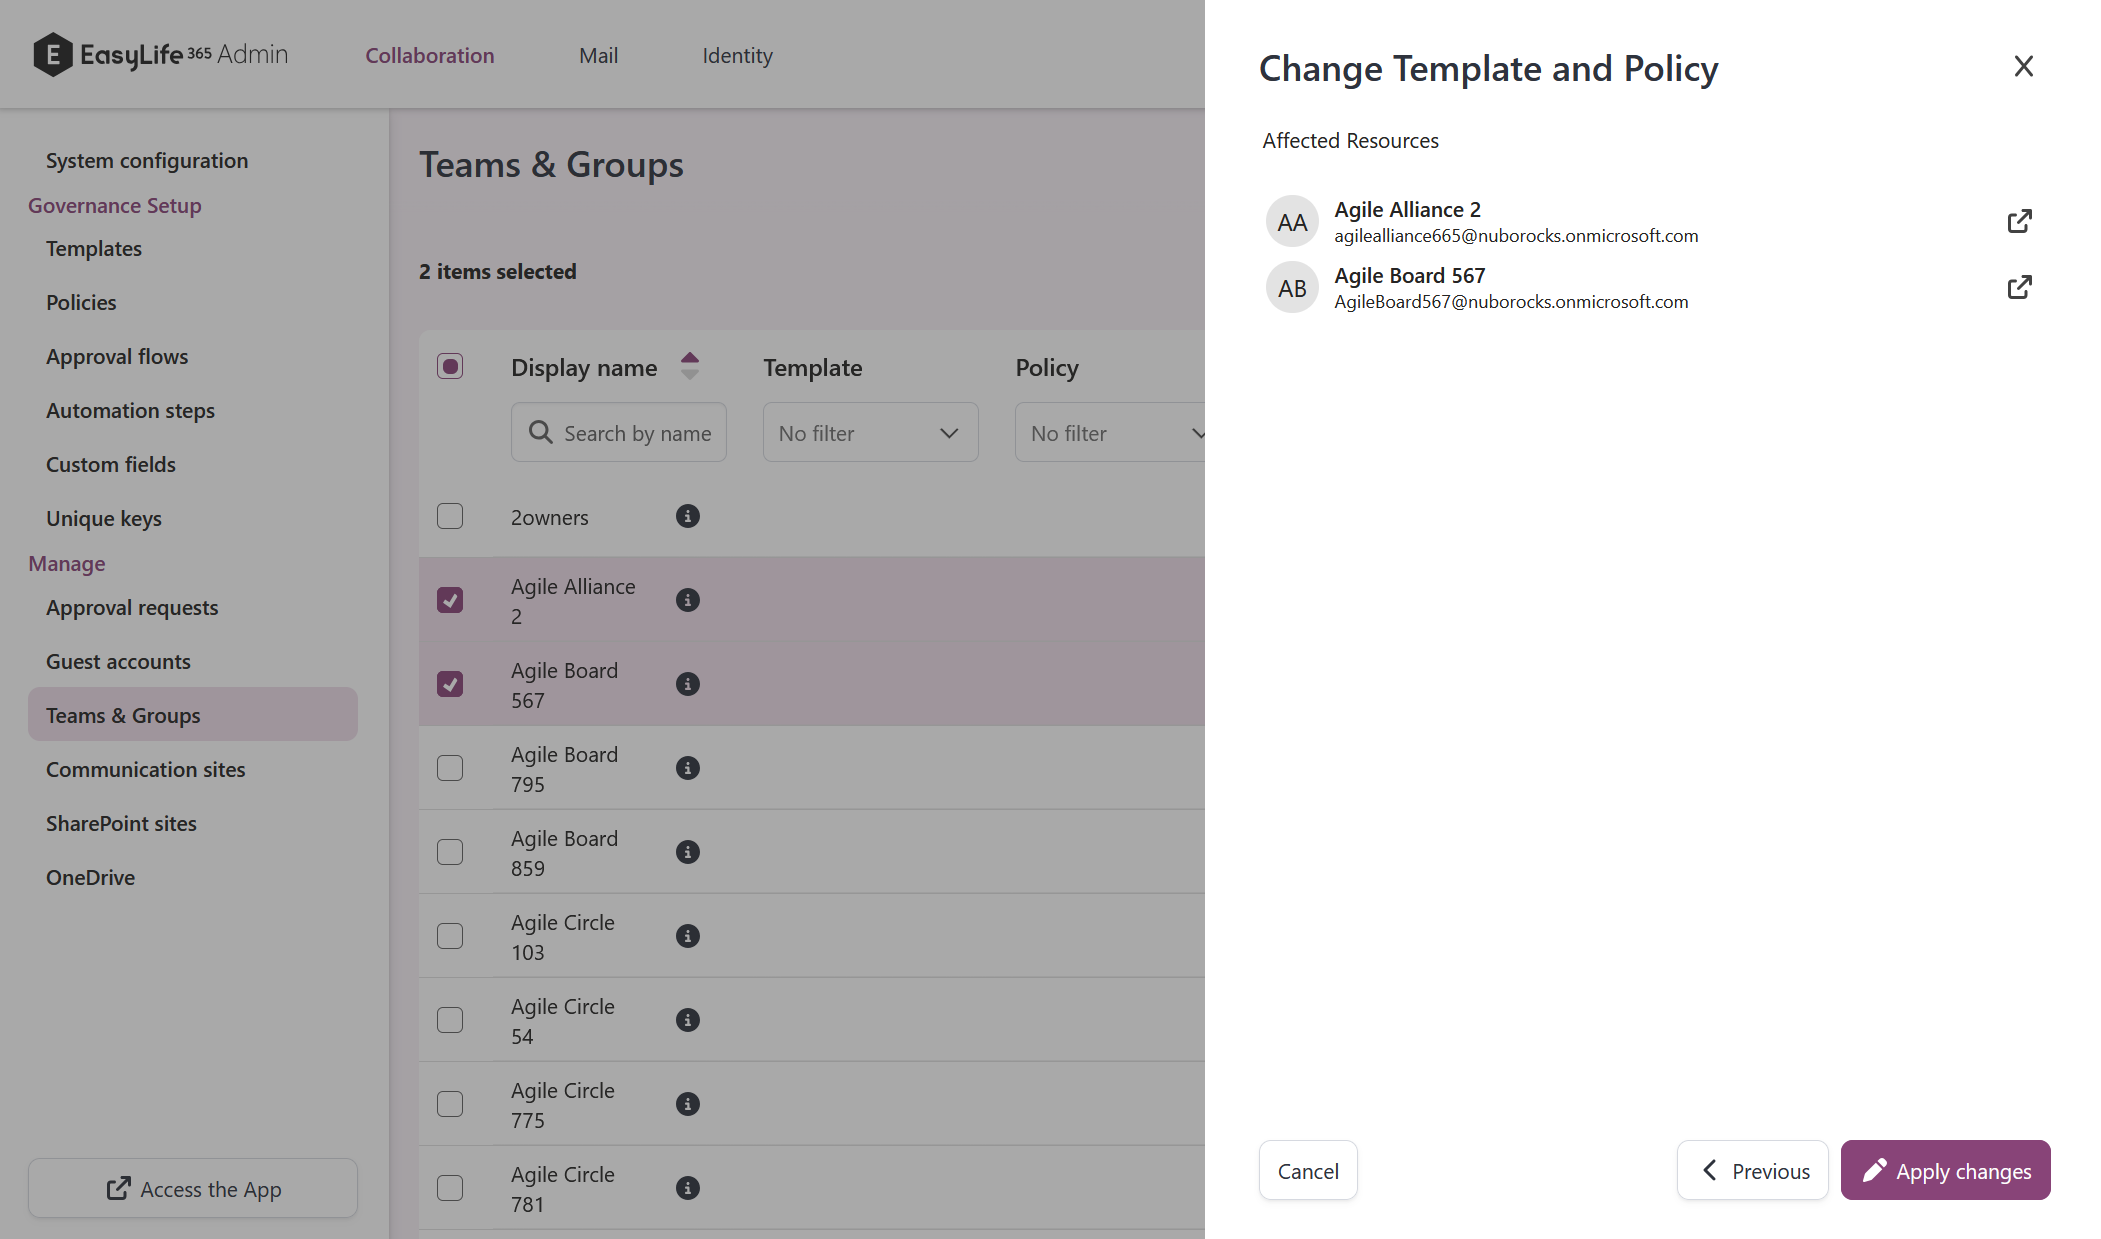
Review the pending changes, then click Apply changes to apply them.
This streamlined process empowers you to edit resources not originally created through EasyLife and enforce your desired life cycle management policies on pre-existing resources. Ensure that your account holds the necessary permissions to edit groups before utilizing the Change Template and Policy features.
Impact of Policy Changes
When altering the assigned policy of a resource, its compliance will be reevaluated against the new policy from the moment of assignment. For instance, if a Team was created outside of EasyLife 365 with only one owner and you assign a policy requiring a minimum of two owners, it will be marked as not compliant in the Policy and compliance status column. The existing owner will receive a notification prompting them to add at least one additional owner.
Impact of Template Changes
Switching the assigned template of a resource solely affects its metadata, leaving properties such as mail nickname, SharePoint URL, or Teams channels unaffected. These properties are only established during the provisioning process. Importantly, altering the policy assigned to a template will not automatically modify the metadata of existing groups.